The Real Cost of a DIY Off-Grid Solar Build, Step by Step
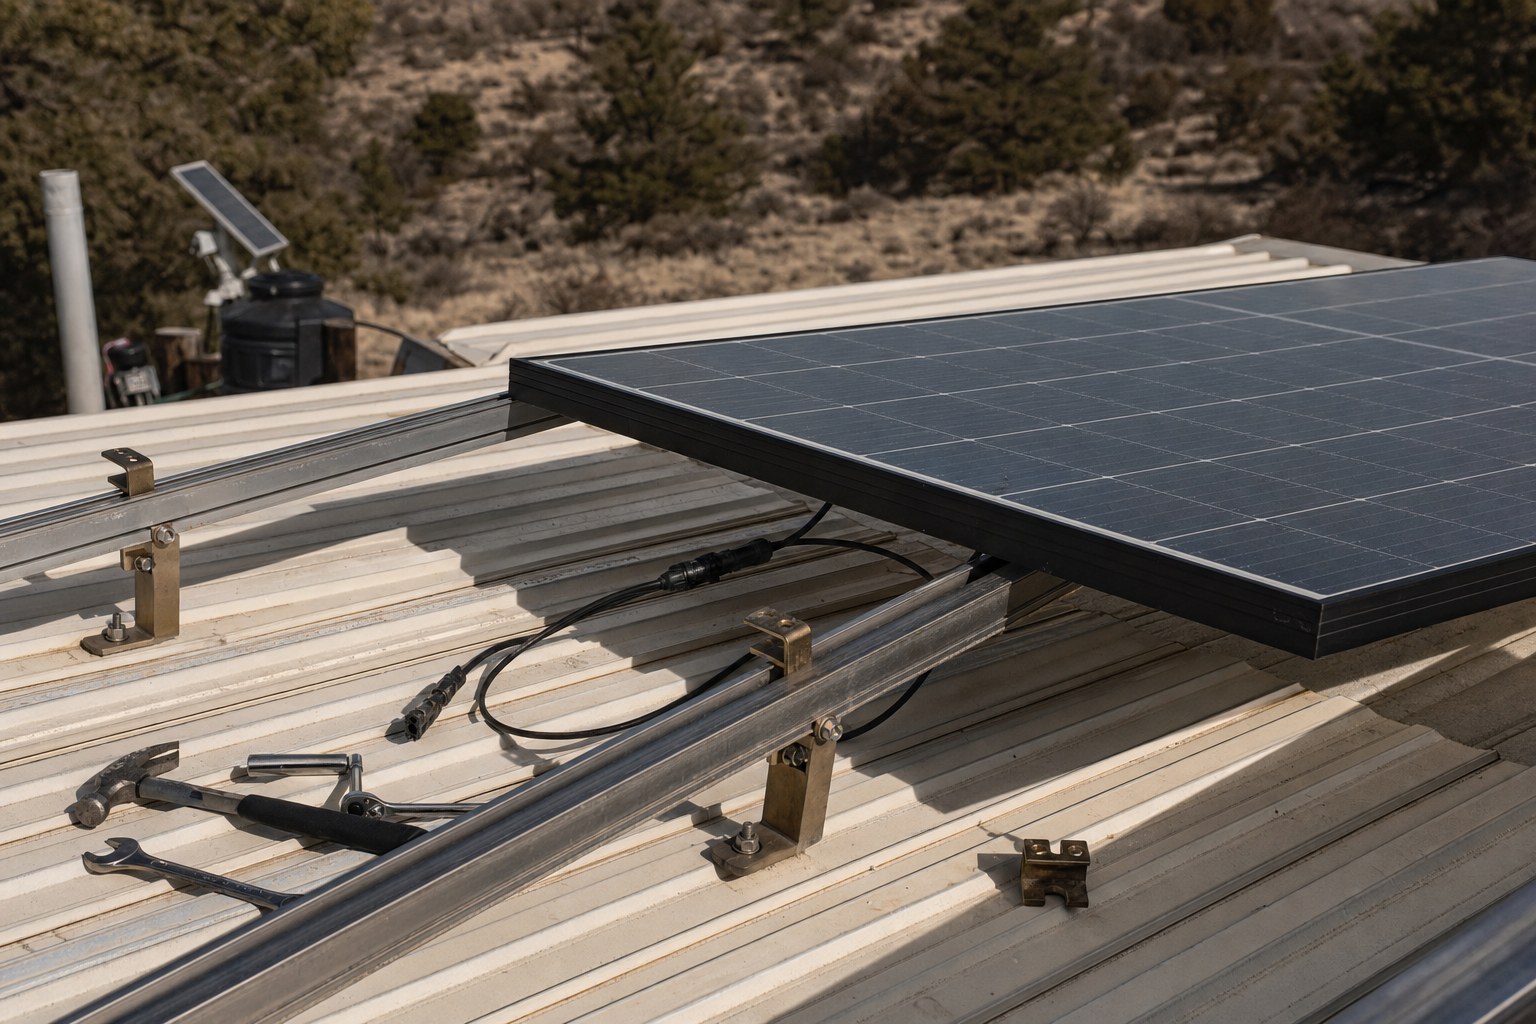
Renogy lists its 800W 12V Solar Cabin Kit at $900. Source the battery bank, the inverter, the cables, and the fuses that were never in the box, and the finished build settles at $1,941 as of Apr 2026. The extra $1,041 buys no upgrades. It buys the first usable watt. Hundreds of listings price the same way, which is why solar installation and DIY planning has to start at the real build cost and work backward, never at the listing.
The sequence below starts where the money leaks, at the gap between a listing and a finished system, then works through the county paperwork, the load audit, the array, the chemistry, the wire, the assembly order, and the commissioning tests. It runs on three tiers, from a shed you finish in an afternoon to a homestead that eats a long weekend, and every dollar figure traces back to a specific kit in our database of 400+ systems.
One scope note up front. Everything here is off-grid. No utility connection appears anywhere in it, which rules out grid-tied inverters and rules out net metering. What the array makes goes into a battery bank, and the system answers to nobody.
Budget the time first: a shed takes 3-5 hours, a cabin 1-2 days, a homestead 2-3 days. Money spans $575 to $5,848 over those same tiers, every figure quoted the way we quote all of them, at real build cost with the missing parts already priced in. Read to the end and you walk away holding four things: a gauge, a fuse rating, an order of operations, and a number that does not move at checkout.
Every system we track is listed with both numbers, sticker and real, in the full kit database.
Step 1: Learn to Read the Gap Before You Shop
More DIY solar budgets die on the gap between listing and real build cost than on anything else. Our database of 400+ kits shows where the holes are:
- 107 kits arrive with no inverter
- 75 kits arrive with no panels
- 32 kits arrive with no battery
An absent inverter costs another $200 to $600 as of Apr 2026, scaling with wattage. Absent batteries run $350 to $1,600+ depending on chemistry and capacity. Neither line is optional. Without a battery the array has nowhere to put what it makes, and without an inverter it cannot run a single AC appliance.
Reading a Completion Gap Receipt
The cleanest specimen is Renogy's 800W 12V Solar Cabin Kit: $900 listed, $1,941 to build. Its Gap Receipt itemizes $1,041 of parts the system requires and the carton omits, which is a LiFePO4 battery bank, a 2000W pure sine wave inverter, battery cables, fuses, and a breaker panel. Incomplete is the design, not an oversight.
Hold that against the Renogy 400W 12V Complete Solar Kit with 200Ah LiFePO4, listed $1,899 and built for $1,899. Nothing absent, nothing to source, and the sticker is the total.
The Eight Parts a System Cannot Skip
Usable off-grid power takes eight components, no exceptions:
- Solar panels, at the wattage Step 3 works out from your load and your PSH
- An MPPT or PWM charge controller rated for the array's voltage and amperage
- A battery bank, LiFePO4 or AGM, at the Wh Step 5 works out from nightly load x DoD multiplier
- A pure sine wave inverter with room above peak AC load for surge watts
- PV wire and battery cables in the gauges Step 6 pulls off the NEC table
- Fuses or breakers, one per circuit, each at 125% of that circuit's max continuous current
- Mounting hardware for whichever it is: roof, ground rack, pole
- Battery-to-inverter cables, which on high-current runs means 4 AWG or thicker
Walk the list against your kit. Price whatever is absent, add it to the sticker, and the sum is your real build cost.
Data Checkpoint: You can take any listing and name what is missing from it.
Milestone: You shop on real build cost from here on. Nothing at checkout surprises you.
Run a side-by-side compare | See how we price a build
Step 2: Clear the Bench and the County
Two things can stop a build before it starts, and neither is technical: a county that wants paperwork you did not file, and a missing tool on a Sunday. Both take one afternoon to clear.
Settle the Permit Question First
A licensed electrician is not a requirement for off-grid work in most US jurisdictions, and the reason is structural rather than lenient. Solar permitting is built on interconnection and net metering rules. A system that never reaches the utility trips neither one. Put that system on a detached shed, barn, or cabin on private land and the case gets cleaner still, because plenty of counties maintain no permitting pathway for an unconnected structure. An electrical permit rarely enters the picture on an outbuilding.
Three conditions flip the answer: a permanent foundation, a primary residence, a connection to the grid. Any one of them and you should expect a permit, plus an electrician to sign the inspection off. Grid-tied builds run in a separate regime altogether, where permits, inspections, and an interconnection agreement vary by state and by utility, clear in something like 4-12 weeks, and finish with an electrician's signature. That is a different article.
Call the county building department before the first purchase. Put the question precisely: off-grid solar, detached structure, no utility connection. Five minutes on the phone beats a fine that outruns the whole system budget.
One insurance item while you have the phone out. If the array will sit on or beside a primary residence, tell your homeowner's carrier. Fire coverage can be voided by an installation they never knew about. Usually it is one call, and usually the rate does not move.
What Each Tier Costs
| Tier | Array Size | Real Build Cost | Example Kit |
|---|---|---|---|
| Shed | ~200W | $575 | ECO-WORTHY 200W 12V Complete Kit with 100Ah Battery + 1100W Inverter |
| Cabin | ~400W | $1,400 - $1,899 | ECO-WORTHY 400W 12V Complete Kit Ultra with 40A MPPT + 280Ah LiFePO4 + 2000W Inverter / Renogy 400W 12V Complete Solar Kit with 200Ah LiFePO4 |
| Homestead | 800-1000W | $1,941 - $5,848 | Renogy 800W 12V Solar Cabin Kit / Renogy 1000W Monocrystalline Solar Cabin Kit |
Read that column as real build cost, never as a listing price. The real build cost methodology shows the arithmetic behind it. If you want battery background ahead of Step 5, the LiFePO4 battery guide covers it.
Six Tools, Four of Which You Already Own
The whole build runs on six tools. A drill/driver, a socket set, adjustable wrenches, and wire strippers are already sitting in most garages. The two that usually are not, a crimping tool and a multimeter, cost under $40 for the pair as of Apr 2026.
The skills bar sits lower than the internet suggests. Three things carry you: knowing that series stacks voltage while parallel stacks amperage, being steady on a ladder if panels are going up on a roof, and reading the wiring diagram that every kit puts in the box. The connection order itself is printed in the charge controller manual.
Step 3: Start From Watt-Hours, Not Panels
Panels come out of the sizing math rather than going into it. Daily consumption is what decides the array. Reverse that order and there are two ditches waiting: an array the battery cannot absorb, or a battery that quits before dawn. Panel dollars spent past the bank's capacity return nothing at all, because a full battery has nowhere to put them.
Building the Load Table
Write down everything the system has to feed, one row apiece, heaviest consumer at the top. Each row gets three numbers: the rated wattage from its label or manual, the hours it runs in a day, and those two multiplied.
Two omissions show up again and again in builds that came out underpowered. Phantom loads never make the table, though a switched-off device still pulls 5-15W while plugged in. And refrigerator runtime gets guessed low. A 12V fridge cycles against ambient temperature, so a summer day realistically means 12-16 hours of compressor time, not the 8 hours a lot of guides print.
| Device | Watts | Hours/Day | Daily Wh |
|---|---|---|---|
| 12V fridge | 50W | 12h | 600 Wh |
| LED lights (5 bulbs) | 50W total | 5h | 250 Wh |
| Laptop | 60W | 4h | 240 Wh |
| Water pump | 100W | 1h | 100 Wh |
| Phone charger | 10W | 3h | 30 Wh |
| Total | 1,220 Wh |
Totalled, that cabin wants 1,220 Wh, or 1.22 kWh a day. A shed carrying nothing but lights and a phone lands near 280 Wh. Go the other direction, to a homestead running a full-size fridge, a washer, and rooms that stay lit, and 3,000 Wh disappears fast.
Turning Watt-Hours Into Array Watts
Minimum array watts = (daily kWh / peak sun hours) x 1.2.
Peak sun hours (PSH) is the regional input. The 1.2 is the loss budget, covering wire resistance, controller efficiency, and temperature derating. The annual average across most of the US is 4-5. Coastal Pacific Northwest bottoms out near 3.5, and the Desert Southwest clears 6. Size to the annual average for a year-round system, or to the winter figure if you want worst-case headroom.
The cabin, run through it: (1.22 kWh / 4.5 PSH) x 1.2, which sets a 325W floor on the array.
Data Checkpoint: Below 0.5 kWh/day puts you in the shed tier, 1-2 kWh/day in the cabin tier, 3 kWh/day and up in the homestead tier.
Milestone: You have a minimum array wattage.
Run your own PSH through the calculator.
Step 4: Match the Tier to a Real Kit
Three tiers below, each with two kits chosen to expose the tradeoff between what a box includes and what it costs.
100-200W: The Shed Build
The ECO-WORTHY 200W 12V Complete Kit with 100Ah Battery + 1100W Inverter posts a $540 listing against a $575 real build cost. Call it 71% complete: 1,280Wh of LiFePO4 storage and a 1100W inverter are already inside the box, and mounting hardware alone closes the $35 gap.
Renogy's 100W 12V Solar Panel Starter Kit with 30A PWM Controller looks like the cheaper way in, and is not. Sticker $160, real build cost $438 as of Apr 2026, 50% of the required components. What ships is a 100W monocrystalline panel and a PWM charge controller. No battery, no inverter. Everything between those two numbers is a sourcing bill with your name on it, and the $378 separating the two stickers is what double the array, a battery, and an inverter cost. That is the line between a power system and a panel with a controller bolted to it.
400W: The Cabin Build
The ECO-WORTHY 400W 12V Complete Kit Ultra with 40A MPPT + 280Ah LiFePO4 + 2000W Inverter lands at a $1,400 real build cost, 86% complete, holding 3,584Wh of LiFePO4 behind a 2000W pure sine wave inverter and an MPPT charge controller. Its missing 14% is monitoring hardware, a Bluetooth module or a display, which touches neither generation nor safety.
Renogy's 400W 12V Complete Solar Kit with 200Ah LiFePO4 asks $499 more, at a $1,899 real build cost. The premium buys completeness rather than function: 100% complete, 2,560Wh of LiFePO4, a 2000W pure sine wave inverter, an MPPT charge controller, all wiring, and an empty Completion Gap Receipt, so sticker and real cost land on one number. It also buys 1,024Wh less storage. The ECO-WORTHY carries 40% more, which against the cabin load above is worth roughly one additional night of autonomy.
800-1000W: The Homestead Build
Renogy's 1000W Monocrystalline Solar Cabin Kit lists at $4,400 and finishes at $5,848 real build cost. It ships 50% complete with no inverter, and its $1,448 gap is that inverter plus wiring and fusing.
Drop to the Renogy 800W 12V Solar Cabin Kit and the shape repeats at a smaller scale: $900 listed, $1,941 real, with no batteries, no inverter, and no battery cables in the carton. The $900 pays for 800W of monocrystalline panels and an MPPT charge controller. You source the other $1,041 yourself: LiFePO4 bank, pure sine wave inverter, cables, fuses. Neither homestead kit is buyable at its sticker.
Data Checkpoint: One tier chosen, one or two kits shortlisted.
Milestone: The size of the build is settled.
See the full kit database | Kits ranked for cabins
Step 5: Size the Bank Around Depth of Discharge
Two questions decide the bank, and they are worth taking in that order: which chemistry, then how much of it. Chemistry is where the ten-year money is won or lost. Capacity is a formula, and it pivots on depth of discharge (DoD), which is exactly where the chemistries part ways.
A Decade of Ownership, Priced
| Chemistry | Upfront per 100Ah (12V) | Cycle Life | Charge Efficiency | 10-Year Cost | Replacements |
|---|---|---|---|---|---|
| Flooded | $250 | 300 | 80% | $4,445 | 11 |
| AGM | $350 | 500 | 85% | $3,120 | 6 |
| LiFePO4 | $800 | 3,000+ | 95% | $1,131 | 0 |
On a bank that cycles regularly, LiFePO4 draws even with AGM somewhere around 2.5-3 years and wins outright after that. Priced per cycle across a 3,000-cycle life it lands at $0.27, against $0.70 for AGM. Then efficiency compounds the spread: 85% efficient AGM throws away 15% of every watt-hour the array makes as heat while charging, and 95% efficient LiFePO4 gives back 5%.
Flooded lead-acid takes the sticker and loses the decade. Replacing it eleven times in ten years drags along labor, disposal, and downtime, none of which the price tag mentions.
The rule that falls out: LiFePO4 for anything cycling daily or living past 2 years. AGM survives one case, the seasonal shed opened fewer than 10 times a year, where a low entry price outruns the cycle math. On the cabin build, LiFePO4 costs $450 more up front and returns $1,989 over ten years against AGM.
Now Size It
With the chemistry settled, capacity comes off one line. What the array makes during the day does not set it. What the house burns overnight does.
Nightly kWh x DoD multiplier = total Wh of battery capacity required.
- LiFePO4 multiplier: 1.25 (80% usable DoD)
- AGM/SLA multiplier: 3.0 (33% usable DoD)
Push the cabin's 1.22 kWh overnight draw through both:
- LiFePO4: 1,220 x 1.25 = 1,525Wh needed
- AGM: 1,220 x 3.0 = 3,660Wh needed
Same usable energy, 2.4x the raw capacity on AGM. No other single factor drives off-grid cost harder. Where LiFePO4 needs 1,525Wh of usable capacity, AGM has to bring 3,660Wh to hold the same overnight runtime.
Data Checkpoint: You know the Wh you need and which chemistry will hold it.
Milestone: The bank is spec'd.
Batteries we track | The long read on LiFePO4
Step 6: Wire and Fuse to the Code Ceiling
Wire too thin for the current it carries is the safety error we see more than any other in DIY solar. Undersized copper does two things at once: it heats, which is a fire path, and it drops voltage, which is production you paid for and never receive. The National Electrical Code (NEC) draws the line at under 3% drop on a DC circuit. Three things get you under it: the right wire, the right gauge, and the right fuse, in that order.
Start With the Right Wire and a Ground Rod
Every outdoor run wants PV-rated wire, meaning USE-2 or PV wire. Standard NM cable (Romex) carries no UV rating, and no direct-burial rating either unless it is in conduit. PV wire is built for 30+ years of UV and goes in without conduit on most installations.
Grounding takes one rod and one wire. Sink an 8-foot copper-clad rod into the earth, land 6 AWG bare copper between it and the system negative bus bar, then tie every panel frame and mounting rail back to that same point.
Wire Gauge, NEC-Based (12V System, <3% Voltage Drop)
| Max Current | Max Wire Run | Minimum AWG |
|---|---|---|
| 10A | 10 ft | 12 AWG |
| 20A | 15 ft | 8 AWG |
| 30A | 20 ft | 6 AWG |
| 50A | 25 ft | 4 AWG |
Working the Table
Work it circuit by circuit. Start with peak amperage, which is watts divided by volts, putting a 400W array at 12V nominal near 33A. Then run a tape along the longest path from source to load. Where a pairing lands between two rows, take the thicker gauge, which reads as the lower AWG number.
Same wattage at 24V pulls half the current, and at 48V a quarter of it. Less current permits thinner copper over longer distances, and that copper bill is one concrete reason large off-grid builds climb to higher system voltages.
Picking the Fuse
One fuse or breaker per circuit, each rated to 125% of that circuit's maximum continuous current. So 25A of fuse on a 20A circuit, 40A of fuse on a 33A circuit.
Three placements are mandatory:
- Between panels and charge controller, at array short-circuit current x 1.25, with Isc coming off the panel spec sheet
- Between charge controller and battery, at the controller's max output current x 1.25
- Between battery and inverter, at the inverter's max input current x 1.25. Nothing else in the system carries this much current.
Data Checkpoint: Every run has a gauge and a fuse size written down.
Milestone: The wiring BOM is finished.
Step 7: The Assembly Order That Protects the Controller
Nothing else in the build is as order-dependent as this. Put array voltage into a controller that has no battery to reference and an MPPT unit dies on contact. Start with the failures, because the sequence that follows exists to prevent exactly these.
The Five Ways This Goes Wrong
- Panels energized ahead of the battery. The controller gets array voltage with nothing to reference it against and no load to absorb it, and an MPPT unit is what dies.
- Non-PV wire run outdoors in UV without conduit: the jacket breaks down inside 2-3 years.
- MC4 connectors seated loose. They arc the first time real current moves and then melt.
- Mixed brands or mixed ages inside one bank. Capacity gets set by the worst cell in it, and lifespan follows the same cell down.
- No wiring diagram drawn before the first connection: errors go up and troubleshooting time roughly doubles.
Connect in This Order
None of the five above happen if the build goes in this order. Take it literally.
- Set the panels on the roof, the ground rack, or the pole, and wire nothing yet. Tilt them at latitude minus 15 degrees if summer output matters most, or straight at latitude for a year-round build. Aim true south in the Northern Hemisphere, remembering that magnetic south sits 5-15 degrees off true south across most of the continental US. Look up local declination and correct for it.
- Hang the charge controller indoors, or in a weatherproof box that breathes. Mount it no more than 4 feet from the bank, which is what keeps the high-current runs short.
- Battery to charge controller comes first. Powering the controller from the bank is what lets it auto-detect 12V, 24V, or 48V. It has to read battery voltage before any panel voltage arrives.
- Panels to charge controller comes last. MC4 connectors click home and lock. Check polarity first, because a reversed pair on a live string is a permanent controller failure.
- Inverter to battery bank rides the heaviest copper you own, 4 AWG or 2 AWG in most builds. Torque every lug to the manufacturer's figure. An under-torqued lug arcs as soon as load shows up.
- Bond every metal frame and rail. Bare copper at 6 AWG, leaving the panel frames, passing the negative bus bar, terminating at the rod.
Data Checkpoint: Everything terminated, nothing arced, and the controller is showing battery voltage.
Milestone: The hardware is built and current runs from panel to bank.
Panel specs by model | Inverter specs by model
Step 8: Program It, Then Prove It
Two jobs are left once the wiring is done. The charge controller has to be told what chemistry sits behind it, and then the whole system gets put under real load while you watch. Here is the output that means it worked.
The Output You Are Aiming At
- Shed, 200W: roughly 5-6 hours of direct sun to fill a 1,280Wh LiFePO4 battery.
- Cabin, 400W: roughly 6-8 hours of direct sun to fill a 2,560-3,584Wh bank.
- Homestead, 800W and up: 3.2+ kWh on a full-sun day, with a 5,000Wh+ bank topped out by mid-afternoon.
Controller Voltages (Get These Right)
Hitting those numbers starts with the controller knowing what it is charging.
Absorption and float voltages answer to the chemistry that is actually in the bank, not the one the controller assumes. Wrong numbers mean one of two failures: undercharging, which hides capacity you already paid for, or overcharging, which risks thermal runaway on LiFePO4 and boils AGM dry. Treat factory defaults as a guess. Open the chemistry selector and check it against the hardware in front of you.
| Chemistry | Absorption Voltage | Float Voltage |
|---|---|---|
| LiFePO4 (12V) | 14.6V | 13.6V |
| AGM (12V) | 14.4V | 13.2V |
Four Tests, In Order
- Read the bank at rest. LiFePO4 sitting full reads 12.8-13.2V. Anything under 12.0V is either a bad cell or a fault quietly pulling the bank down.
- Read panel Voc. Pull the panels off the controller and put the multimeter across the leads. Open-circuit voltage should land on the spec sheet figure, which is 18-22V on a 12V-nominal panel. Well short of that means shade, a damaged panel, or a bad connection.
- Watch the charge current. Panels back on. In daylight the controller display should read positive amps into the battery. Full sun and zero amps is a wiring fault or a dead fuse.
- Load it. Send your worst AC appliance through the inverter and watch the bank. Voltage should hold above 11.5V for the duration. Drop under 11V and most inverters cut out on their low-voltage protection.
Data Checkpoint: Amps read positive, bank voltage rises through the sun hours, and the inverter carries your worst load without tripping.
Milestone: The system is live and proven.
Check your output against the math
What the Receipts Show
With every missing part on the ledger, the three tiers land here.
Homestead: The Renogy 800W 12V Solar Cabin Kit, $1,941 real build cost as of Apr 2026. Its $900 sticker pays for panels and an MPPT charge controller, full stop. Budget the other $1,041 of required missing parts (LiFePO4 battery, pure sine wave inverter, wiring, fuses) before you order, not after. The Renogy 1000W Monocrystalline Solar Cabin Kit repeats the structure at $5,848 real build cost, with core components left out of the box.
Cabin: The ECO-WORTHY 400W 12V Complete Kit Ultra with 40A MPPT + 280Ah LiFePO4 + 2000W Inverter, $1,400 real build cost for 3,584Wh of LiFePO4, which is the best storage-per-dollar in the tier at $0.39/Wh. 86% complete, monitoring hardware being the only absence. Prefer nothing left to source? The Renogy 400W 12V Complete Solar Kit with 200Ah LiFePO4 sits at $1,899 with no required missing parts and no gap. That $499 premium buys 100% completeness and gives up $1,024 of storage doing it (2,560Wh vs. 3,584Wh).
Shed: The ECO-WORTHY 200W 12V Complete Kit with 100Ah Battery + 1100W Inverter, $575 real build cost as of Apr 2026. Inside: an MPPT charge controller, a 1100W inverter, 1,280Wh of LiFePO4, and 200W of monocrystalline panels. It reads 71% complete, and mounting hardware is the entire shortfall. Storage works out to $0.45 per Wh.
Across every tier the finding is the same. Sticker price describes the carton. Real build cost describes the system. We publish a Gap Receipt on each kit we track, itemizing what arrives, what does not, and what the finished build comes to.
The full kit database | Put two kits head to head | Size your build
Questions We Get About DIY Off-Grid Builds
Off-grid versus grid-tied: what separates them?
Off-grid banks its energy in batteries and answers to no utility. Grid-tied exports surplus and imports whatever solar misses, which brings permits, an interconnection agreement, and net metering approval along with it. This guide stays on the off-grid side.
Is this doable with zero electrical background?
On a shed under 200W, yes. There are four boxes and three hops between them, and the kit prints the diagram. Once a build reaches cabin or homestead scale it is moving 30-80A, and that is where a little DC wiring knowledge earns its keep. The two joints that punish mistakes are controller-to-battery and battery-to-inverter, because reversed polarity or undersized wire shows up there first.
Is an inverter mandatory?
Only if something in the build has a standard wall plug. Run a shed on 12V DC lighting and USB charging and you can skip the inverter entirely, which keeps $150 to $400 in your pocket. Anything on a wall plug (a fridge, a laptop brick, a power tool) needs a pure sine wave inverter stepping 12V DC up to 120V AC.
How do I pick a wire gauge?
Gauge answers to two inputs together, amperage and run length. Step 6 has the NEC table. A 400W cabin at 12V typically wants 8 AWG on main runs shorter than 15 feet and 6 AWG out to 20 feet. Between two rows, take the thicker gauge every time.
How much time does the install actually take?
A shed runs 3-5 hours, a cabin 1-2 days, a homestead 2-3 days. All three assume parts already on site and hands that have used the tools before. First build? Add 50% to whatever number you picked.
What is the service life of each component?
AGM batteries are the short straw at 500 cycles, which daily use turns into 1-2 years. LiFePO4 runs 3,000+ cycles, roughly a decade of daily cycling. Controllers and pure sine wave inverters sit at 10-15 years. Panels carry a 25-year warranty and are still expected to hold better than 80% of rated output at the end of it (less than 20% loss). Build on LiFePO4 and the bank is the one part unlikely to see year eleven.
Read Next
Explore the Data
Track the prices, not the hype
We track real build costs across 400+ off-grid kits and email the biggest verified price drops every week. See this week’s drops.